Pages

Tuesday, March 27, 2012

Bustin' Ours... To Feed Yours!

Before I began student teaching, one of my class projects was to make a bulletin board to display in the ag building on campus. I thought I would share the picture of it; I think it turned out extremely cute. I hope that all of the high school FFA students enjoy it when they visit for Spring judging contests.


You can see how important agricultural literacy is to me; because without agriculture, we would all be naked and hungry. Let's give a hand to the 2% of Americans employed in production agriculture, that help feed more than just our country. Another hand to everyone else in an agriculture field, which is almost everyone...

Think about it!

Monday, March 19, 2012

Dear, I Want a Deer!

It's hard to imagine that I was wearing coveralls and three jackets to stay warm just a month or two ago, and now I'm finding every excuse possible to wear shorts, and even tank tops. I was cleaning out the pictures on my phone the other day, after realizing how many pointless pictures I take to send to K, like food and random signs. I stumbled across this one, and remembered how sweet this little guy was.


The people that had this little guy in their backyard had rescued him by the road in front of their house, where his mother was hit. I would just love to have one someday. (Look, he wanted me to take him home, he was giving me kisses!) I'll just add that to my list of animals K is supposed to get me one day: a Zeedonk, a Belted Galloway, a Pomsky, a Prairie Dog, a Royal Antelope, a Pygmy Hippopotamus, and so on... 

A girl can dream, right? 

Sunday, March 18, 2012

T-Shirt Surgery: Racerback Tank

It's almost summertime, which means busting out the shorts, flip-flops, and of course, tank tops! when cleaning out my closer the other day, I found a plain-jane pink t-shirt, a size too big, and still in the bag from the store. I guess I probably had intentions on making this shirt into something, so I did!


Steps

  1. Cut the neck seam out.
  2. Chop the sleeves off!
  3. Now cut deeper on the neckline, as shown in the picture. If you don't, you'll wind up choking yourself when you decide to wear it. 
  4. Now cut deeper around the arms, so that the straps are narrower. Keep the scraps!
  5. Cut the bottom hem off. This is optional, but I like the flowy effect. 
  6. Turn the shirt where the back is facing up. Midway of the arm cut-outs, gather the fabric, and tie it off with the scrap fabric. (See the picture below.) Either stitch or glue it in place, so it will last through washing. 

Finally, decorate your shirt as you please, or leave it plain. It's all up to you;  I chose to stick with something simple and small at the bottom of my shirt once I was through. 

Bring on the sunshine! 


"Dew you Love Me" Cupcakes

I thought I would share this Mountain Dew cupcake recipe I came up with that K says is awesome. They were his Valentine's Day gift (hence the name I gave them.) The particular day I made these I was also baking cookies, so the kitchen was a bit of a mess, but both treats turned out well.


"Dew You Love Me" Cupcakes 
Ingredients:
1/2 c butter
1 c sugar
1 1/3 c flour
1 tspn. baking powder
2 eggs
1 c Mountain Dew
1/8 c lemon juice
1/4 c lime juice

Steps:
  1. Pre-heat oven to 350°.
  2. Beat butter and sugar together until fluffy.
  3. Add eggs, one at a time, and mix thoroughly
  4. Add flour and baking powder gradually, mixing evenly. Be sure to scrape the sides well!
  5. Add the Mt. Dew, lemon juice, and lime juice. (You can add more for a stronger flavor.)
  6. Fill cupcake liners 3/4 full.
  7. Bake for 18-20 minutes or until toothpick inserted in center comes out clean.
  8. While those are baking, prepare the frosting!


"Love Me Even More" Frosting (both mine and K's favorite part, I feel bad I cheated)
Ingredients:
1 container of your favorite buttercream frosting (for time-sake)
2 tbsp. Mountain Dew
1 tbsp. lemon juice
1 tbsp. lime juice
green food coloring

Steps:
  1. Spoon frosting into a more spacious bowl/container.
  2. Add Mountain Dew, lemon juice, and lime juice, mixing evenly.
  3. Taste the frosting to make sure you like the flavor; like before, you can adjust. 
  4. Stir in a few drops of food coloring, until you reach a desired color. 
  5. Spread over cooled cupcakes as you desire... Or just grab a spoon and have at! 
As you can see in the picture above, I added little conversation hearts to K's cupcakes. I also made some for my neighbors who graciously acted as my guinea pigs. (I love the picture they sent me moments after receiving them!)


I'll take it that they dew love them!!

Check the Cupboard!

I usually think of myself as a fairly organized person. With that in mind, I usually check to make sure I have all ingredients necessary before I start baking... Go figure though, when I go to bake K's favorite cookies, I don't. I had already cracked the eggs, whipped the butter, and measured out my flour and white sugar before I realized I was completely out of brown sugar.


I frantically searched the cabinet for something to replace it, and I came up with an idea. Since brown sugar is really just sugar coated with molasses, I knew I needed something sticky. So I added double white sugar of what the recipe calls for, and then added two tablespoons of honey, in place of the brown sugar. It worked like a charm, and K couldn't even tell the difference, except that the color was a bit lighter than usual.

Just remember, 2x the white sugar, and 2 tsbp. honey, and that should do the trick!

Cats & Dogs

Have you ever had that "wish I had my camera right now" moment? I do all the time. Thank goodness we have phones, right? Well sometimes I actually do part with my beloved, and then I miss out on very picture-worthy moments. Take for example the other day, when my barn cat, Pip, was curled up with one of the dogs, Molly. She was stretched out snoozing, with her little cat friend curled up between her legs and under her tail. It looked as if Pip was rather warm. The point though, was that I missed out on that picture. 

Lucky for me though, these two are extremely close friends... So a few days later, I was able to capture this with my phone: 


That's Pip, on top of Molly; I guess he wasn't as cold as before. In the background, you will notice P.J. (Pip Junior, guess who his father is?) He is always sneaking around, looking jealous of Pip and Molly. Don't let him fool you though; he is mean to Molly and her big brother Cash. Ever since he was an orphan kitten, P.J. would walk up to the dogs and slap his claws into their nose, or grab their tail and take a ride around the barn... It's his own fault he doesn't have any friends. 

"The only way to have a friend is to be one." -Ralph Waldo Emerson

Deck the Drawers

I know Christmas was months ago... But I just have to say, I LOVE the sales afterwards. I take up on the opportunity to buy all kinds of decorations and doo-dads; either for creating something new, or saving them until next year. This year I found some very cute (and non-Christmas-y) wrapping paper. I have been saving it for a special occasion, yet to be determined at the time. 

When I was preparing to move out of my apartment recently, I decided that my plastic drawer totes looked a little boring... And an idea was born! I decked my drawers, with wrapping paper! (These drawer totes are very popular among college students, I don't know why more companies don't make them more colorful!)

Supplies:
  • Plastic drawer tote
  • Scissors
  • Ruler
  • Pen/Pencil
  • Mod Podge
  • Wrapping paper of your choice! 
It's a very self-explanatory process: Measure your drawers perimeter and height (give yourself extra length, just in case.) Then cut the paper accordingly. Paint a generous amount of Mod Podge on the inside walls of each drawer, then add the wrapping paper, printed side against the plastic. Let them dry overnight, so the paper does not get ripped up. Ta-da! 

Super easy, and so many possibilities! 

Hodge Podge of Mod Podge

Lately it seems like tutorials on making your own mod podge have been popping up like those beautiful wildflowers along the highway... Everywhere! So I decided to jump aboard, and try it out. It was extremely simple, and only took a matter of minutes.


Step 1: Locate some glue and a suitable jar... I recycled a taco sauce jar; I usually eat tacos multiple times a week.

Step 2: Dump all the glue in the jar. This is the time consuming part, but it still only takes a minute or two.

Step 3: Add water. The amount of water should equal the amount of glue. This reminds me of science projects in the fifth grade to observe density and such.

Step 4: Shake, shake, shake! Then label it! (I gave the mod podge a test run, and it worked great!)

Step 5: Mod podge everything you own! Just kidding... Or am I? I have a little foam paint brush I like to use to apply it, and it has been getting much use since I made my Mod Podge.

Glue: 97¢
Jar: Free
The ability to Mod Podge to your heart's desire: Priceless! 

Saturday, March 17, 2012

Spring is in Session!

Somewhere a midst the hustle and bustle of school and now student teaching, I have found very few opportunities to unleash my creativity, and when I have, I haven't found time to share it. For that, I apologize. However, with stock show season over, I have found myself back on track, with a little spare time to split between reading, blogging, and of course pinning!

With that said, I wanted to share this beautiful flowers I found blooming on campus. (Can you say, Spring is in session!) K swears they look fake, but I can guarantee you they are real.


They brightened my day, I hope they brighten yours too!

Friday, February 10, 2012

Stairway to Heaven


While the title is usually thought of as an infamous piece of Led Zeppelin's work, today's topic is not music. It's cupcakes! I have been out of town and away from the land of internet for quite some time now... I live in a house where you pay for internet, but still don't get it. So now that I am visiting my hometown, I took the great opportunity to catch up on some much-needed blog time. Coincidentally, it was also my neighbor's birthday, so I had the perfect excuse to tear apart the kitchen in a baking frenzy.

As most people already know, I'm a chocoholic, so it is only natural that I baked chocolate cupcakes. I used the following very straight forward recipe. You'll notice it has brown sugar, which isn't the most common. It helps make the cupcakes a bit fluffier I think; that special something a cupcakes deserves.

Chocolate Cloud Cupcakes


  • 1/2 cup butter
  • 1 cup sugar
  • 1 cup brown sugar 
  • 1 3/4 cup flour
  • 2 eggs 
  • 3/4 cup cocoa powder 
  • 1 1/2 tsp baking soda
  • 1 1/2 tsp baking powder
  • 1 tsp vanilla
  • dash of salt
  • 1/2 cup milk or water 
  1. Preheat oven to 350 degrees Fahrenheit. Either grease a muffin pan or line it with cupcakes liners, your choice!
  2. Beat together the butter and sugars until fluffy. 
  3. Add eggs, one at a time, followed by vanilla.
  4. Add flour, baking soda, baking powder, cocoa powder, and salt gradually. 
  5. Add milk or water if components are not sticking well and need moistening. 
  6. Fill cupcake slots: part of them should be 1/4 full, some 1/2 full, and some 3/4 full. This step is VERY IMPORTANT.
  7. Bake 18-20 minutes. 
  8. Let cupcakes cool before frosting as your heart desires! 

Once your cupcakes are ready to be decorated, layer them by size into rows, smallest in front, then medium, then large in the back. They should resemble little stairs, hence the name of this creation, "Stairway to Heaven."

You will then need to add more frosting to each layer, smoothing it across all of the cupcakes to make a 'banner' to write your message. It should look like this when you are done:


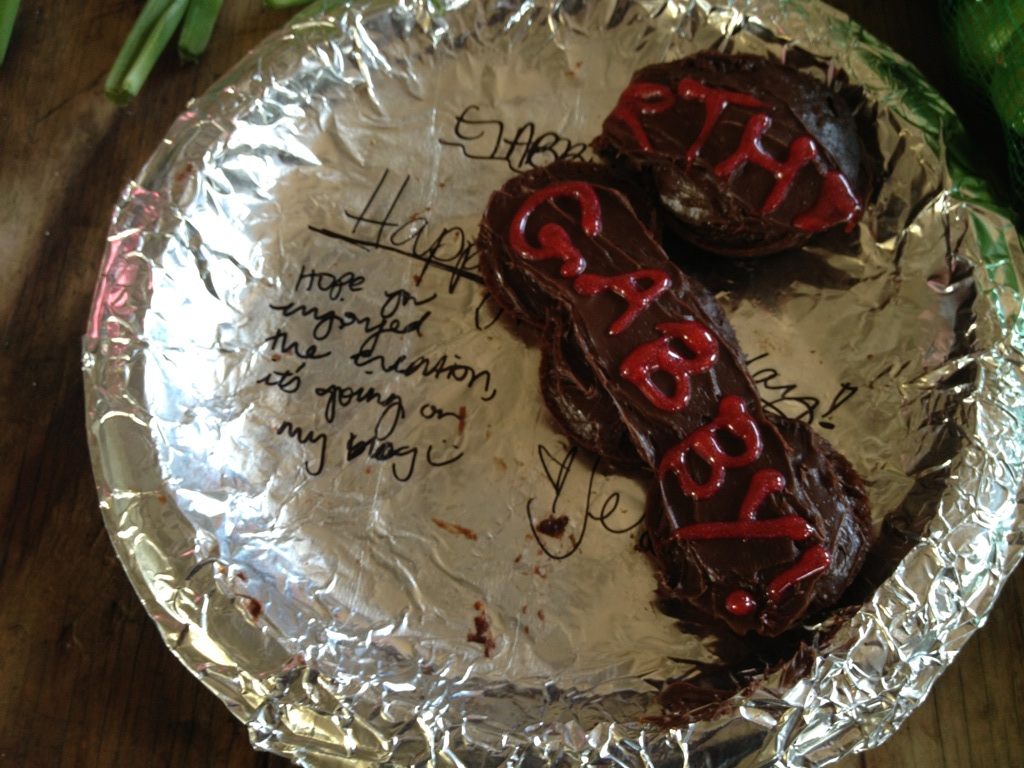
Gabby was thrilled about her cupcakes. She sent me this picture once they were partially devoured, revealing the little note I left her:


Remember, it's the simple things!